Wedding Photo Booth Backdrop: What Photographs Well
WeddingSnap Team
8/18/2026
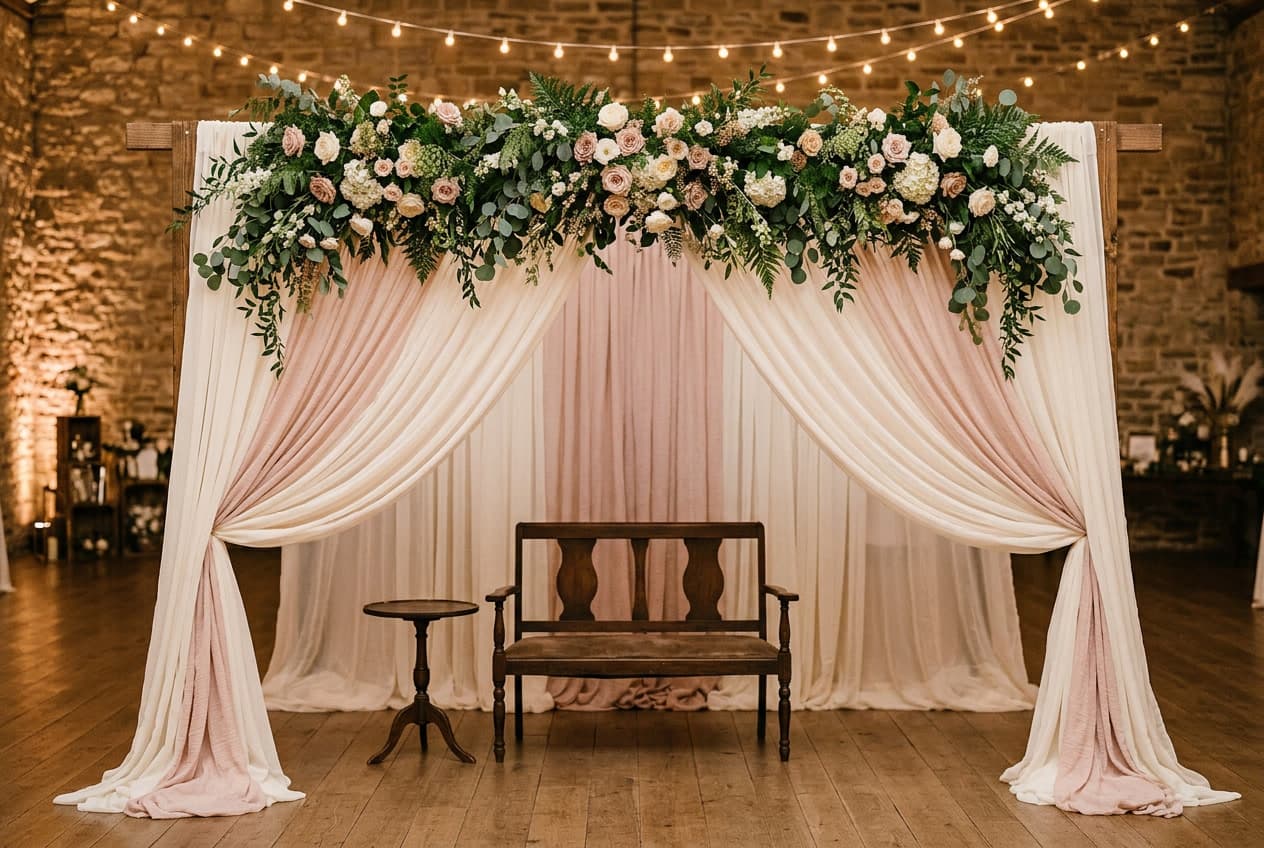
A wedding photo booth backdrop has exactly one job, and it isn't looking beautiful on Pinterest. It's not ruining the photo.
That distinction matters more than it sounds. Plenty of backdrops that look stunning in a styled flat-lay photograph terribly under a phone flash in a dark reception hall — shiny, creased, too narrow, or so busy that guests disappear into them.
Here's what actually holds up on camera, what it costs, and the two measurements that fix most DIY backdrop problems.
There's no shortage of inspiration out there — The Knot's photo booth roundup and Zola's DIY guide are both good for ideas. What they don't tell you is which of those ideas survive contact with a phone camera in a dim room.
Get the size right before anything else
This is where most DIY backdrops fail, and no amount of florals fixes it.
Make it at least 8 feet wide. A 5-foot backdrop works fine for two people and falls apart the moment six bridesmaids pile in — which they will. You'll spend the night getting photos with cropped shoulders and a visible wall edge on one side.
Make it 7 to 8 feet tall. Tall enough that the top edge stays out of frame when someone raises their arms, and long enough at the bottom that the floor transition isn't in shot.
Leave a 2 to 3 foot gap. Stand guests two to three feet in front of the backdrop, not pressed against it. This one change does more for photo quality than any material upgrade. Pressed against the fabric, you get flat lighting and hard shadows on the backdrop itself. With a gap, the background falls slightly out of focus and people look like they're in a portrait rather than a lineup against a wall.
Mark the standing spot on the floor with tape or a small rug. Guests will stand exactly where you tell them to and nowhere else.
Backdrop materials, ranked by how they photograph
Fabric drape ($40–$120)
The cheapest reliable option and the most forgiving. Two rules: it must be matte, and it must be wrinkle-free.
Shiny polyester and satin throw hot spots under flash — bright white blown-out patches that ruin an otherwise good photo. Heavy velvet, linen, muslin, and chiffon all absorb light instead of bouncing it.
Wrinkles are the other killer. Fabric that shipped folded will have creases that show in every single photo. Steam it the day before, or hang it 48 hours ahead and let gravity do the work.
Greenery or floral wall ($80–$250 DIY)
The Pinterest favorite, and genuinely excellent on camera because texture reads well at any distance.
The DIY version: rent or build a frame, then zip-tie faux garland to it in overlapping rows. The mistake is going too thin — greenery that looks full in your hands reads sparse on camera with gaps showing the frame behind. Budget roughly 50% more garland than you think you need, and layer it so no structure shows through.
Neon or marquee sign on a plain wall ($100–$300)
High impact for low effort, and it doubles as reception decor for the rest of the night.
Keep the wall behind it dark and simple — the sign is the entire feature, and a busy background fights it. One caution: neon is a light source, so it will cast color onto faces. A warm white or soft pink sign flatters skin. A bright blue or green one makes everyone look ill.
Custom printed fabric ($100–$200)
Your monogram, invitation pattern, or a repeating motif printed to size. The most cohesive-looking option if you already have a wedding design language.
Order a swatch first. Colors print differently than they appear on screen, and a backdrop that arrives two shades off from your palette is an expensive mistake you can't fix in a week.
A wall you already have ($0)
The most underrated option. Brick, ivy, weathered wood, a hedge, a painted mural, a bookshelf wall.
Walk your venue at the exact time of day your reception happens — not on a sunny afternoon tour — and look for one. A great existing wall beats a mediocre rented backdrop, and it costs nothing. Check the light there before committing; the perfect wall in a pitch-dark corner needs the same lighting work as anything else.
Backdrops that look good and photograph badly
A few popular choices are traps.
- Sequin and metallic curtains. They photograph as a chaotic mess of blown-out specular highlights under flash. They look great to the eye and terrible on camera.
- Balloon walls. Fun, but they deflate over a long reception and start sagging by the time the dancing starts. If you use one, have it inflated as late as possible.
- Busy patterns. Anything with high-contrast repeating detail competes with faces. Guests get visually lost in it.
- Pure white. Blows out under flash and leaves guests looking underexposed by comparison. Soft neutrals, deep tones, and textures all beat plain white.
- Fringe or streamer curtains. They move constantly, so half your photos have a streamer across someone's face.
Where to put it
Backdrop placement is a traffic problem more than a design one.
Put it somewhere guests naturally pass but don't need to walk through — near the bar or between the cocktail area and the dance floor works well. Tucked into a far corner, it gets forgotten by 9pm.
Check what's behind the camera, too. If the photographer's back is to a bright window or an exit sign, that light spills into every shot. And leave at least 8 feet of clear space in front for people to stand and queue.
One thing couples forget: check the backdrop against the venue's own lighting. Uplighting in a reception hall is often colored, and a warm ivory drape under blue uplighting turns grey on camera.
Lighting matters more than the backdrop itself
Worth saying plainly: a cheap fabric drape that's well lit beats an expensive floral wall in the dark, every time.
Reception venues are dim by design. Without a dedicated light, phones compensate by raising ISO, and you get grainy, muddy, orange photos regardless of what's hanging behind your guests. A single ring light or softbox aimed at the subjects — not at the backdrop — solves most of it.
We go through the full setup in our guide to wedding photo booth lighting, including what to do about fall and winter receptions that are pitch dark by 5pm.
A backdrop budget that works
For a typical reception, here's a setup that photographs well without overspending:
- Adjustable backdrop stand, 8ft+: $40–$70
- Matte fabric drape in a soft neutral: $50
- Faux greenery garland for the top edge: $40
- Ring light or small softbox: $50
- Floor tape or a small rug to mark the standing spot: $15
Around $200 total, and the stand and light are reusable. Compare that to $700–$1,500 for a full booth rental, which we break down in our photo booth app vs rental comparison.
The backdrop isn't the point
Here's the part that's easy to lose sight of while you're comparing garland suppliers.
Nearly a third of the weddings on our platform happen in May and June alone, and roughly six in ten fall on a Saturday. What we see across those galleries is consistent: the backdrop determines how the photos look, but it has no bearing on whether the couple ever sees them.
Plenty of couples build a beautiful backdrop, guests take hundreds of photos in front of it, and those photos stay on guests' phones forever. A backdrop is a stage. You still need a way to collect what happens on it.
The simplest fix is a QR code on a small sign beside the backdrop — guests scan, upload, and everything lands in one gallery. Our complete DIY wedding photo booth guide covers how the delivery layer fits with each setup, and photo booth props covers what guests hold while they're standing there.
Collect what happens in front of it
WeddingSnap gathers every photo and video your guests take — at the backdrop and everywhere else. Guests scan a QR code and upload. No app download, no accounts, one-time $39.99.
See the live demo, or download free QR sign templates to stand beside your backdrop.
Frequently asked questions
How big should a wedding photo booth backdrop be?
At least 8 feet wide and 7 to 8 feet tall. Anything narrower can't fit group shots, and you'll get cropped shoulders and visible backdrop edges in photos. Stand guests two to three feet in front of it rather than against it.
What is the best fabric for a photo booth backdrop?
Matte fabrics — velvet, linen, muslin, or chiffon. Avoid satin, sequins, and shiny polyester, which throw blown-out hot spots under flash. Whatever you choose, steam it or hang it 48 hours early so there are no creases in every photo.
How much does a DIY wedding photo booth backdrop cost?
Around $150–$250 for a complete setup including a stand, matte drape, greenery garland, and a light. A greenery or floral wall built yourself runs $80–$250 depending on how full you make it, versus several hundred for a professional install.
Can I use a plain wall as a photo booth backdrop?
Yes, and it's often the best option. Brick, ivy, wood paneling, or a hedge all photograph beautifully and cost nothing. Walk your venue at the time of day your reception actually happens to find one, and check whether that spot has enough light.
What backdrop colors photograph best?
Soft neutrals, deep saturated tones, and anything with visible texture. Avoid pure white, which blows out under flash and leaves guests looking underexposed, and avoid busy high-contrast patterns that compete with faces.