Photo Booth Lighting: The $50 Fix for Bad Booth Photos
WeddingSnap Team
8/18/2026
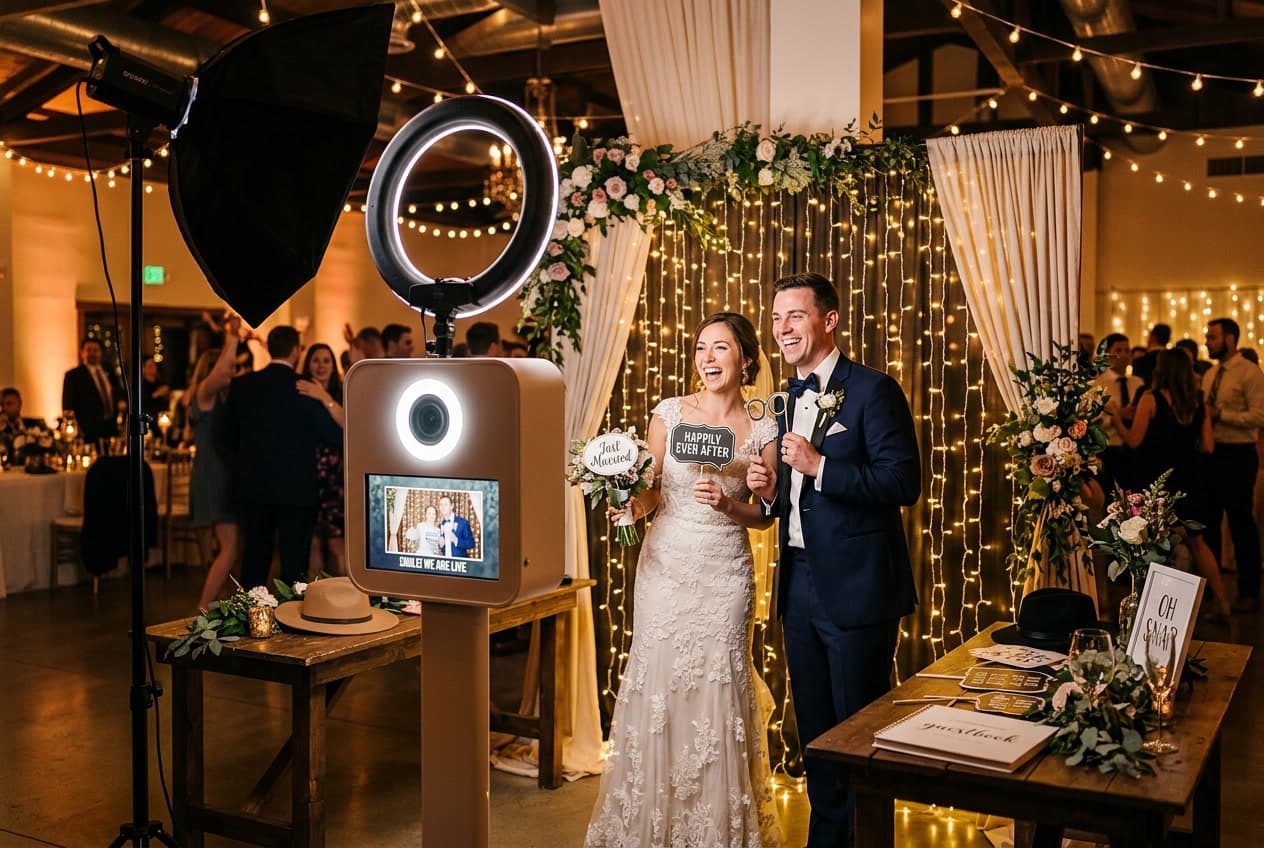
Bad lighting ruins more DIY photo booths than bad backdrops, bad props, and bad cameras combined. It's also the line item couples budget for last, if at all.
The frustrating part is that it's cheap to fix. A $50 light solves most of it. The problem is that almost nobody realizes there's anything to fix until they're looking at the photos afterward, wondering why everyone is orange.
Here's what's actually happening, and how to set up photo booth lighting that works in a real reception venue.
It's telling that the major DIY booth guides — The Knot's and Zola's included — treat lighting as a decor choice, listing fairy lights and neon alongside ring lights. Those are not the same category of thing, and confusing them is how you end up with a beautiful booth and unusable photos.
Why your booth photos look grainy and orange
Reception venues are dark on purpose. Dim, warm lighting is flattering in person and creates atmosphere — and it's close to the worst possible condition for a camera.
When there isn't enough light, your phone or iPad compensates two ways. It raises the ISO, which introduces grain and muddy color. And it slows the shutter, which means any movement blurs. Guests at a photo booth are moving constantly, so you get soft, noisy photos.
Then there's color. Venue lighting is often heavily tinted — warm tungsten, or colored uplighting washing the walls. Cameras try to correct for it and frequently guess wrong, which is why everyone comes out looking orange or unnaturally cool.
One dedicated light aimed at your guests overrides all of it. The camera stops guessing and starts working from a known, consistent light source.
The one-light setup that covers 80% of it
You don't need a three-point studio rig. For a DIY booth, one good light in the right place does nearly all the work.
Get a ring light or a small softbox. Both run roughly $40–$80. A ring light is easier — it mounts on the same stand as your phone or tablet and produces even, flattering light with the characteristic circular catchlight in the eyes. A softbox produces softer, more natural-looking light but needs its own stand and a bit more thought about placement.
Put it in front of your subjects, slightly above eye level, angled down. Above eye level matters — light from below is the classic horror-movie look, and light from directly in front and level is flat.
Set it to warm. Most decent lights let you adjust color temperature. Aim for 2700K–3200K. This is the single most-skipped setting and it makes a visible difference: warm light flatters skin tones, while cold white LEDs make everyone look like they're in a fluorescent-lit office.
Diffuse it. If your light has a diffusion cover, use it. If it doesn't, tape a sheet of white parchment or a thin white pillowcase over the front — bare LEDs produce harsh light and sharp shadows.
The three mistakes that cause most bad booth photos
- Backlighting. A window, a bright doorway, or a string of bulbs behind your subjects turns them into silhouettes. Your camera meters for the bright background and everything in front goes dark. Never put your booth in front of a window that will still be bright at reception time, and never put your light behind the guests.
- Overhead light directly above the booth. Ceiling lights or a chandelier directly over the standing spot cast shadows straight down — dark hollows under eyes, nose, and chin. Move the booth a few feet, or turn that fixture off if the venue allows.
- Lighting the backdrop instead of the people. An easy mistake. Your light should be aimed at the guests' faces, not at the fabric behind them. A well-lit backdrop with dark guests in front of it is the exact opposite of what you want.
Fall and winter weddings need more light than you think
This is worth planning around specifically.
Our booking data shows November now outpacing both September and October — later-autumn weddings are genuinely on the rise, not a niche choice anymore. And there's a practical consequence nobody mentions in the venue tour: those receptions are fully dark by 5pm.
If you're planning an outdoor booth or counting on golden hour through a window, a late-autumn or winter wedding gives you a usable natural-light window of about twenty minutes. After that, whatever artificial lighting you brought is doing 100% of the work.
Summer is the opposite problem. Nearly a third of the weddings on our platform land in May and June, and an outdoor booth in early evening can get harsh direct sun — squinting guests, hard shadows, blown-out highlights. Position an outdoor booth in open shade rather than direct sun, and it'll photograph far better.
String lights are decor, not lighting
Fairy lights, Edison bulbs, and neon signs all look wonderful and produce almost no usable light for photography.
Use them freely — they make gorgeous backgrounds, and out-of-focus bulbs behind guests create that warm bokeh glow that reads as "wedding." Just don't count on them to illuminate faces. They belong behind your subjects as atmosphere, with a real light in front doing the actual work.
The one caveat with neon: it's a colored light source, so it casts its color onto nearby skin. Warm white and soft pink are flattering. Bright blue and green are not.
Light the prop table too
Small detail, real impact. A prop table in a dark corner effectively doesn't exist — guests walk past without registering what's on it.
A cheap clip-on light or a battery puck light on the table is enough. The same goes for your QR sign or instructions card: if guests can't read it in the ambient light, it isn't doing its job. More on that in our guides to wedding photo booth props and choosing a photo booth backdrop.
Test it in the actual conditions
The most common lighting failure isn't a wrong purchase. It's testing the setup in a bright living room in the afternoon and assuming it'll behave the same in a dim hall at 9pm.
If you can get into the venue beforehand, set up the booth and take real photos at roughly the time of night your reception will be running. If you can't, test at home with the lights off after dark. Look at the results on a phone screen at low brightness, which is how most people will see them.
Check three things: are faces properly exposed, are the photos sharp rather than motion-blurred, and do skin tones look natural rather than orange or grey?
A lighting kit that works
- Ring light or small softbox with adjustable color temperature: $50–$80
- Sturdy light stand, if not included: $25
- Extension cord and gaffer tape to secure it: $20
- Clip light or puck light for the prop table: $15
Around $110–$140, and it's the highest-return money in the entire booth budget. A $50 light in front of a $40 fabric drape produces better photos than no light in front of a $400 floral wall.
And run power properly. Tape the cord down before guests arrive — a light on battery will die around hour three, and a loose cord across a walkway is a genuine hazard on a dance floor.
Good light, then get the photos
Lighting determines how the photos look. Delivery determines whether you ever see them. Our complete DIY wedding photo booth guide covers both halves and all nine setups.
WeddingSnap collects every photo and video guests capture — scan a QR code, upload, done. No app download, no guest accounts, one-time $39.99.
See the live demo, or grab free QR sign templates for your booth.
Frequently asked questions
What lighting do I need for a DIY wedding photo booth?
One ring light or small softbox with adjustable color temperature, running around $40–$80, covers most of it. Place it in front of your guests, slightly above eye level and angled down, set to a warm 2700K–3200K, with diffusion over the front.
Why do my photo booth pictures look grainy?
Not enough light. In a dim venue your camera raises ISO to compensate, which introduces grain and muddy color, and slows the shutter, which blurs any movement. A single dedicated light aimed at your subjects fixes both.
What color temperature is best for photo booth lighting?
Warm, around 2700K to 3200K. It flatters skin tones and matches typical reception lighting. Cold white LEDs above 5000K make guests look washed out and clinical.
Can I just use string lights for my photo booth?
Not as your main light. String lights, Edison bulbs, and neon signs produce almost no usable illumination for photography. Use them behind your guests as atmosphere — they create lovely background bokeh — and put a real light in front to actually illuminate faces.
Where should I put the light at a photo booth?
In front of your subjects, slightly above eye level, angled down toward their faces. Never behind them, which creates silhouettes, and never aimed at the backdrop instead of the people. Avoid placing the booth directly under a ceiling light, which casts shadows under eyes.
How do I light an outdoor photo booth?
Position it in open shade rather than direct sun to avoid squinting and harsh shadows. For evening or autumn weddings, plan on artificial light doing all the work — a late-autumn reception is fully dark by 5pm, so natural light gives you roughly twenty usable minutes.