DIY Wedding Photo Booth: 9 Setups That Actually Work
WeddingSnap Team
8/18/2026
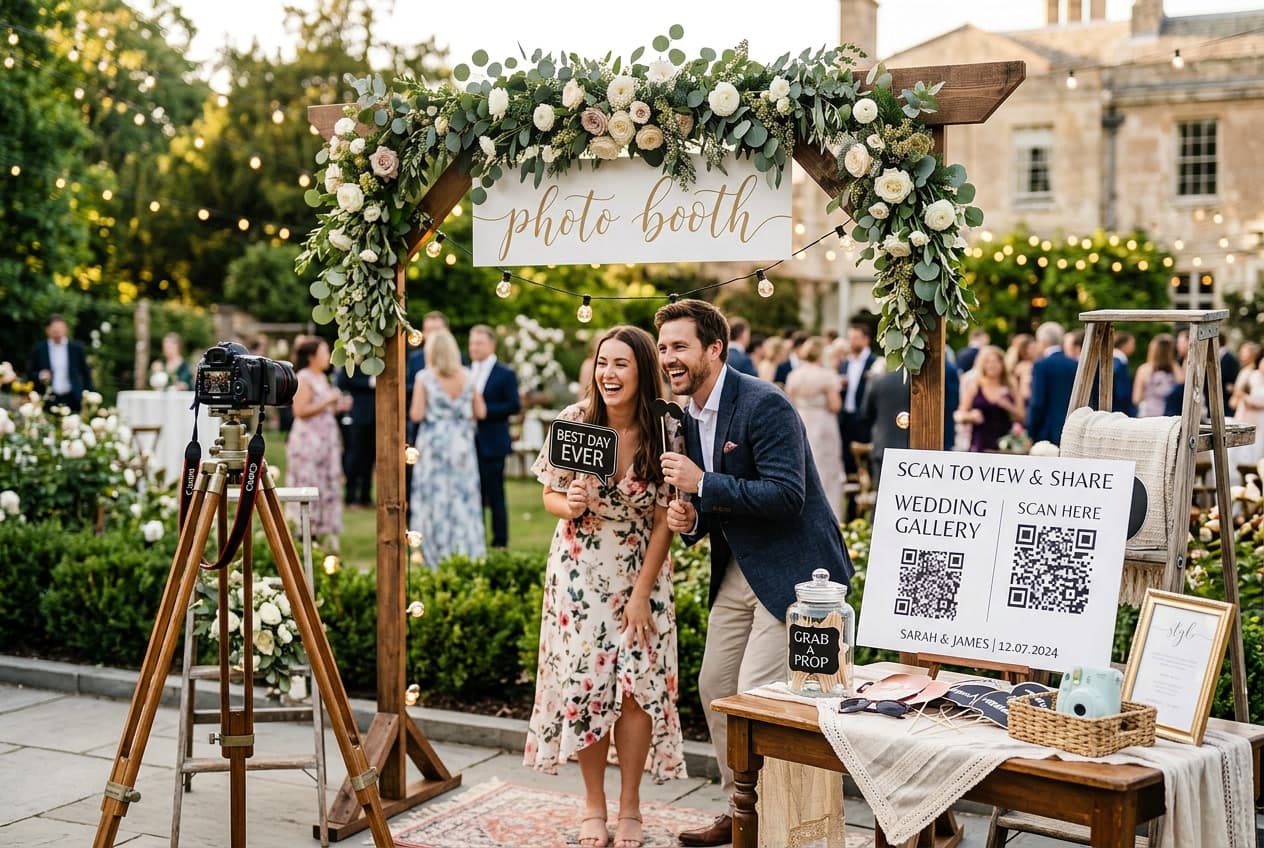
Every DIY wedding photo booth guide teaches you how to build a camera. Backdrop, ring light, iPad on a tripod, a basket of mustache props on a stick. Then it stops.
None of them answer the question you'll actually care about the Monday after your wedding: where did the photos go?
That's not a nitpick. It's the whole job. We run guest photo galleries for weddings, and the pattern in our data is hard to miss — the couples who end up with hundreds of guest photos aren't the ones who built the fanciest booth. They're the ones who decided how photos would get back to them before they bought a single yard of fabric.
So this guide is organized backwards from the rest of the internet. Delivery first, hardware second. Nine setups, honest costs, and the specific things that break at 9pm when nobody's watching the booth.
What you're actually competing against on price
A professional photo booth rental in 2026 runs roughly $700 to $1,500 for a three- to four-hour package with an attendant, unlimited prints, and a digital gallery afterward. That's the number your DIY setup has to beat — not just on cost, but on the part couples forget to price: someone whose entire job is making sure the thing keeps working.
For context on that spend, couples now average around $292 per guest according to The Knot's annual wedding study. A booth is one of the most requested reception add-ons, which is exactly why it's priced the way it is.
Here's the timing problem nobody mentions. Nearly a third of the weddings on our platform land in May and June alone, and bookings jump about 70% from April into May in a single month. Roughly six in ten are on a Saturday, and about four in five fall on a Friday or Saturday. Every couple in your metro is competing for the same booth, on the same night, in the same eight-week window.
That's when quotes go up and the good vendors go dark. It's also the strongest argument for DIY — not that it's cheaper, but that it's available. If you want the full rental-versus-app cost breakdown, we did that math separately in our wedding photo booth app comparison.
The mistake every DIY photo booth guide makes
Go read the top-ranking DIY photo booth articles right now — Zola's guide, The Knot's, the big wedding blogs. They're genuinely good on backdrops and props. Then you reach the section on sharing photos, and the advice is: make a wedding hashtag.
In 2026 that's a dead end. Hashtag reach collapsed years ago, a large share of your guests' accounts are private, and Stories evaporate in 24 hours. You cannot reconstruct your wedding from a hashtag — we wrote a whole post on what to use instead of a wedding hashtag, because this advice keeps getting recycled.
The other half of the standard advice is instant cameras and disposables. Those are lovely objects. They are also a photo graveyard — the images live on film or on a device, and someone has to physically collect, scan, or develop them. Ask anyone who found three undeveloped disposables in a gift bag six months later.
Meanwhile, look at what the premium end of the market actually does. The most requested booth at weddings in 2026 is the 360 video booth, and the way it delivers footage to guests is a QR code they scan to download the clip to their phone. The $1,500 rental and the $0 setup have converged on the same delivery mechanism.
Which tells you something useful: the capture hardware is the commodity. The delivery is the product.
Step one: pick your delivery method, then build around it
There are only three honest ways photos get from your reception to you.
- A scannable gallery. Guests scan a QR code, shoot or upload, and everything lands in one place you own. No app install, no account, works on every phone in the room. This is the only method that scales past a single booth.
- Prints. A dye-sublimation printer like a Canon Selphy (around $130–$150) or an instant camera. Guests keep something physical. You keep whatever they leave behind — which is often nothing, unless you're also capturing digitally.
- Physical media. Disposables, Polaroids, SD cards. Highest charm, highest failure rate, longest lag before you see a single image.
Most good weddings use two: a scannable gallery as the backbone, plus one physical format for the tactile fun. What you shouldn't do is pick only a physical format and hope.
Once delivery is settled, the hardware question gets much simpler — and much cheaper.
9 DIY wedding photo booth setups that actually work
Ordered by effort, from zero-build to full-build. Each one lists what it costs, what it's good at, and how the photos get to you.
1. The QR corner (no build, $0 hardware)
A sign, a backdrop, good light. No camera at all — guests use the phones already in their pockets, scan the code, and shoot. Two hundred cameras instead of one.
This sounds like a cop-out until you do the math on a real reception. A single booth is a bottleneck by design: one line, one corner, one angle, and it sits empty during dinner and dead during the last dance. A scannable gallery runs in every room at once, including the parts of the night no booth ever sees — the getting-ready room, the parking lot, the 1am diner run.
Delivery: straight to your gallery, live. Best for: every wedding, as the backbone layer. Cost: the sign.
2. Phone on a tripod with a remote ($40–$80)
A cheap tripod, a phone clamp, and a $12 Bluetooth remote. Set a 3-second timer or hand guests the remote. This is the classic booth experience for the price of a round at the bar.
Watch for: whose phone is it? If it's a bridesmaid's, you'll be chasing her for AirDrops for a month. Use an old phone you can dedicate to the job, or point the shots into a shared gallery instead.
Delivery: manual export, unless it uploads automatically. Best for: small weddings and tight budgets.
3. The instant camera table ($80–$200 plus film)
A Fujifilm Instax and a stack of film. The camera is the printer — no software, no queue, nothing to crash. Guests tape prints into a book and write a note beside them, which doubles as your guest book.
Film is the real cost. Budget roughly a dollar a shot, and expect guests to burn through a pack faster than you think. Cap it around 100–150 exposures and pair it with a digital layer.
Delivery: physical only. Best for: a guest book alternative with real charm.
4. The selfie frame ($25–$60)
A handheld frame — foam board, wood, or acrylic — with your names and date on it. Guests hold it up and shoot with their own phones. It's having a genuine moment on Pinterest right now, and it's the highest fun-per-dollar item on this list.
It also solves a problem full booths don't: it's portable. The frame travels to the dance floor, the bar, the sparkler exit. No dedicated corner required.
Delivery: guests' phones — so pair it with a QR sign or you'll never see the shots. Best for: receptions with no spare corner.
5. The iPad booth ($300–$600 with gear)
An iPad on a sturdy stand at chest height, running a booth app, with a ring light in front. This is what most people picture when they say "DIY photo booth," and it looks the most like a rental.
Two hard requirements. A real stand, not a tabletop tripod that a tipsy uncle will knock over. And power — an iPad running a camera app at full brightness for four hours will not survive on battery. Run a taped-down extension cord before guests arrive.
Delivery: depends entirely on the app. Check whether it exports full-resolution originals or compressed copies before you commit. Best for: couples who want the classic booth look.
6. DSLR plus dye-sub printer ($600–$1,000+)
The full build: a DSLR or mirrorless body, external flash or softbox, tethering software on a laptop, and a dye-sublimation printer for lab-quality 2x6 strips. Genuinely excellent output.
Be honest about what this is. It's a semi-professional AV install that someone has to babysit, and at that price you're within range of just hiring the rental with the attendant included. Do this if you already own the camera and enjoy the project — not to save money.
Delivery: prints, plus a laptop full of RAW files. Best for: photographer couples.
7. The DIY 360 platform ($400–$900)
A rotating arm, a phone, a small riser, and a lot of patience. Kits now exist at a fraction of what rentals charge, and the output is the single most-shared thing at a modern reception.
The catch is that 360 booths need a person. Guests don't intuitively know to stand still, hold the pose, and wait for the arm to come around. Unstaffed 360 setups produce a lot of blurry nothing. If nobody's assigned to it, skip it.
Delivery: QR download, same as the pros. Best for: dance-heavy receptions with a designated friend running it.
8. The disposable camera basket ($15–$25 each)
One per table, a sign explaining what to do, and a box to return them to. The aesthetic is unbeatable and the failure rate is real — expect a chunk to walk off, and expect a chunk of what's left to be thumbs and ceiling.
Developing runs $15–$20 per camera and takes weeks. If you love the look but not the lag, the digital disposable camera approach gets you the grain and the limited-shot game without the developing bill. We compared the two head to head in QR codes vs disposable cameras.
Delivery: weeks later, at the lab. Best for: couples who want the film look and have patience.
9. The live slideshow wall ($100–$300 if you rent a projector)
Not a booth — a display. Guest photos appear on a projector or TV within seconds of being taken, and the wall becomes its own attraction. People shoot specifically to see themselves show up.
This is the sneaky-best option, because it turns delivery into entertainment. The gallery stops being a chore you're asking guests to do and becomes the thing they're gathered around. Here's how to run a live wedding photo slideshow without a laptop babysitter.
Delivery: already handled — that's the point. Best for: cocktail hour and dinner.
Wedding photo booth backdrops that actually photograph well
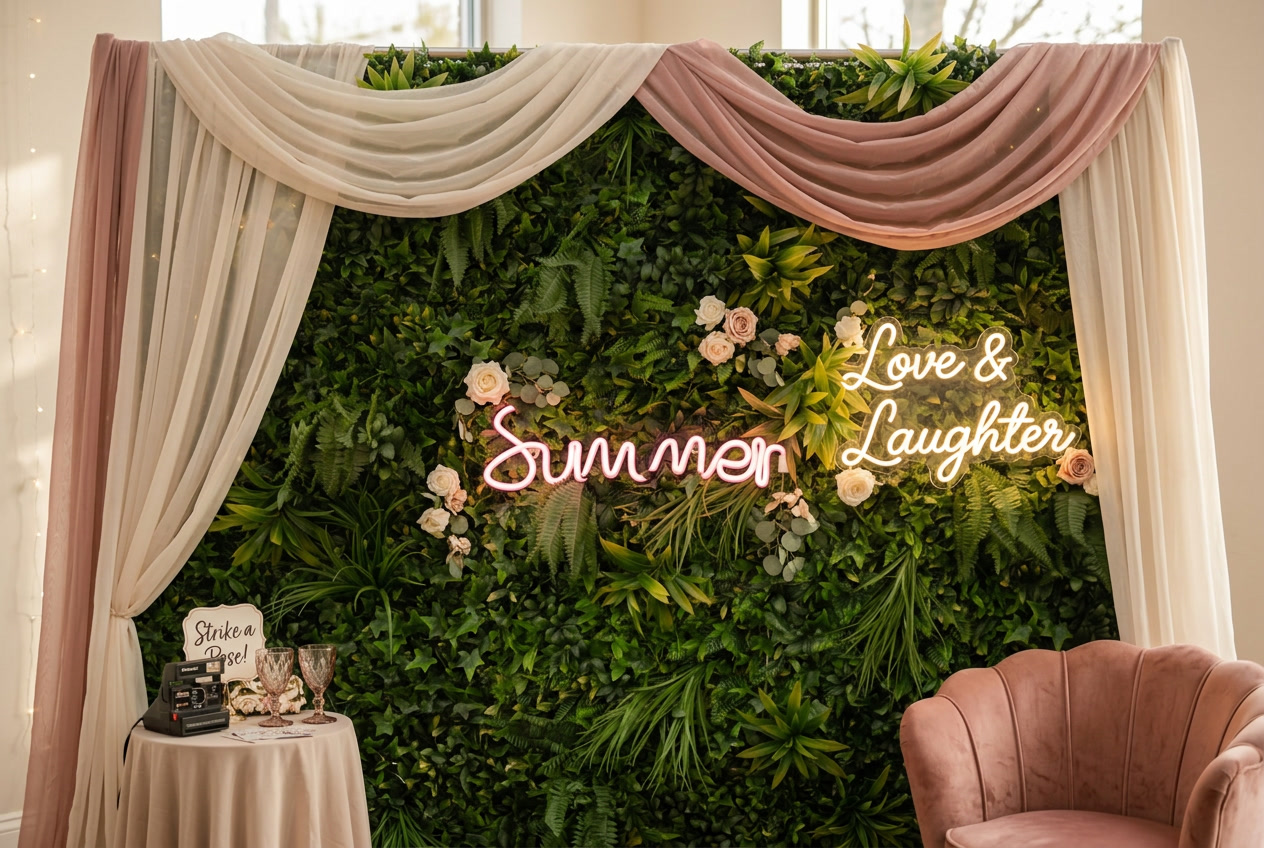
Backdrops are where DIY budgets go to die, and most of the spend is wasted. A backdrop has exactly one job: don't ruin the photo.
- Fabric drape. The cheapest reliable option. It must be wrinkle-free — steam it, or every photo has creases in it. Heavy velvet and linen photograph far better than shiny polyester, which throws hot spots under flash.
- Greenery or floral wall. The Pinterest favorite. Renting a frame and zip-tying garland to it costs a fraction of a professional install. Build it deeper than you think — thin greenery reads as sparse on camera.
- Neon or marquee sign on a plain wall. High impact, low effort, and it doubles as reception decor afterward. Keep the wall dark and simple so the sign carries it.
- Custom printed fabric. Your monogram or invitation pattern, printed to size. The most "designed" look, usually $100–$200.
- A good existing wall. Free. Brick, ivy, wood paneling, a hedge. Walk your venue at the time of day your reception actually happens and look for one before you buy anything.
Two rules regardless of which you pick. Make it at least 8 feet wide, or group shots won't fit and you'll get cropped shoulders all night. And stand your subjects two to three feet in front of it, not against it — that gap is the difference between a portrait and a mugshot.
We go deeper on materials, sizing, and the backdrops that look great but photograph badly in our full guide to choosing a wedding photo booth backdrop.
Lighting is what actually ruins DIY booths
Bad lighting kills more DIY photo booths than any other single factor, and it's the thing couples budget for last.
Reception venues are dark on purpose. Your phone or iPad compensates by cranking the ISO, and you get grainy, muddy, orange photos of the best night of your life. A single $40–$70 ring light or a softbox aimed at your subjects fixes most of it.
Timing matters more than couples expect. Our booking data shows November now outpacing both September and October — fall and early-winter weddings are genuinely on the rise. Those receptions are pitch dark by 5pm, which means an outdoor booth relying on golden hour has a usable window of about twenty minutes.
Three fixes that cover most situations:
- Put the light in front of your subjects, never behind them. Backlighting turns guests into silhouettes.
- Kill any overhead light directly above the booth if you can — it casts raccoon shadows under everyone's eyes.
- Use warm bulbs (2700K–3000K). They flatter skin. Cold white LEDs make everyone look like they're at the DMV.
If you only fix one thing on this page, fix this one. Our guide to wedding photo booth lighting covers the full setup, the color temperature settings most people skip, and what to do about receptions that are dark by 5pm.
Props, without the clutter
The prop table is where DIY booths get tacky fastest. A dozen plastic mustaches on sticks photograph like a dozen plastic mustaches on sticks.
Better: fewer, larger, and personal. A couple of oversized signs with inside jokes. One great hat. Sunglasses. Something that references how you met. Ten well-chosen props beat forty from a party-store bulk bag. We break down exactly what to buy, what to make, and what to skip in our guide to wedding photo booth props.
The highest-value prop isn't an object at all — it's instructions. Guests freeze at booths because they don't know what to do. A small card reading "recreate your worst school photo" or "show us your best dance move" produces dramatically better shots than an empty backdrop and a basket. We keep a running list of wedding photo prompts for guests you can steal directly.
What breaks on the day (and how to prevent it)
Nearly every DIY booth failure we hear about traces back to one of five things.
- Nobody tested it end to end. Not the camera — the whole chain. Take a photo, share it, and confirm it lands where it's supposed to, on someone else's phone, on cell data. Do this a week out, not the morning of.
- Power. Tablets, ring lights, and printers all die around hour three. Assume nothing runs on battery for a full reception.
- Venue Wi-Fi. It will be saturated or password-locked. Any setup that needs Wi-Fi to deliver photos needs a cellular fallback, or it quietly stops working mid-reception and nobody notices.
- No owner. Assign one specific person — not "the wedding party," an actual named human — to glance at the booth twice an hour. Unowned booths drift out of frame, run out of film, and go unnoticed.
- The sign is invisible. If guests can't tell what the booth is and what to do in about three seconds, they walk past. Big text, one instruction, at eye level. We give away free QR code sign templates you can customize and print.
The setup we'd actually build
If you want a straight recommendation instead of nine options: run a scannable gallery as the backbone, add one physical format for charm, and put a screen somewhere people can see it.
Concretely — a QR sign at the entrance and on every table so the whole night is covered, one nice backdrop with a ring light in a corner for the classic booth shots, an instant camera or selfie frame for something guests can hold, and the live slideshow running through dinner.
Total hardware cost lands well under a rental, nothing needs an attendant, and every photo taken anywhere at your wedding ends up in one place — including the ones from the parts of the night no booth was ever pointed at.
That last part is the whole reason to build it this way. A booth captures a corner. A gallery captures the wedding.
If you're still deciding between approaches, our comparison of wedding photo sharing apps covers the tradeoffs, and the complete guide to wedding QR codes walks through the delivery layer in detail. For inspiration on what to actually ask guests to shoot, start with our wedding guest photo ideas.
Ready to build yours?
WeddingSnap is the delivery layer for any of the setups above. Guests scan a QR code, shoot or upload, and everything lands in one gallery you keep — no app download, no guest accounts, unlimited photos and video, one-time $39.99.
See exactly what guests see in the live demo, browse free QR sign templates for your booth, or check what's included.
Frequently asked questions
How much does a DIY wedding photo booth cost?
Anywhere from the price of a printed sign to about $1,000. A no-build QR corner costs almost nothing, a phone-and-tripod setup runs $40–$80, an iPad booth with lighting lands around $300–$600, and a DSLR-plus-printer build runs $600–$1,000 or more. Compare that to $700–$1,500 for a professional rental with an attendant included.
Do I need a photo booth app for a DIY wedding photo booth?
Only if you're running a tablet-based booth. If guests are using their own phones, you need a way to collect the photos rather than an app for taking them — a QR code linking to a shared gallery does that without anyone downloading anything.
What size should a wedding photo booth backdrop be?
At least 8 feet wide and 7 to 8 feet tall, so group shots fit without cropping. Stand guests two to three feet in front of it rather than against it — the gap creates depth and prevents harsh shadows falling on the fabric.
Is a DIY photo booth actually worth it, or should I just rent one?
Rent if you want prints, an attendant, and zero responsibility on the day. Go DIY if you want budget flexibility, coverage beyond one corner, or if you're marrying in peak season when the good vendors are already booked. Nearly a third of the weddings on our platform fall in May and June alone, which is exactly when rentals get scarce and expensive.
How do guests get their photos from a DIY photo booth?
The most reliable method is a QR code that opens a shared gallery — guests scan, upload, and can browse and download everyone else's photos afterward. Prints and instant cameras give guests something immediate to keep, but leave you with nothing digital unless you're capturing to a gallery at the same time.
Do guests need to download an app to use a QR code photo booth?
No. A well-built QR gallery opens straight in the phone's browser. Anything that requires a download or an account will lose a meaningful share of your older guests, which is the fastest way to end up with an empty gallery.